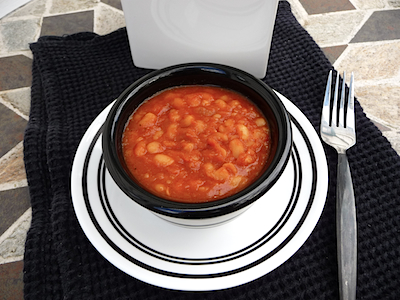
Crémeux Soupe à la Tomate
January 9th, 2013 by Mama
“Grilled cheese and tomato soup is the ultimate comfort meal.”
~ Ina Garten, American Author, Barefoot Contessa TV host
Okay, I am not French, but I aspire. Hmm…how to make creamy tomato soup sound more enticing? Simple, make the recipe sound foreign. LOL.
But, in all seriousness, I am a child of the 80’s. I grew up on instant food. Originally it was mac-n-cheese and pot pies. My dad just cooked them as the box read, but my Mom at least added some nice things to make them more “adult.” Like chives in the mac-n-cheese.
By the time I was in high school I was cooking “instant” foods for myself. I had this one crazy comfort meal that I used to make on the days I was home alone and ruled the place. I liked to have several different bowls or plates with something different on them, so I would make one scrambled egg, half a grilled cheese sandwich, one bowl of corned beef hash and a huge bowl of tomato soup. Not all that vegetarian, I know, but who knows any better at 15? I used to add extra bits to all of it, little rosemary here, little dijon there, but the only thing to add to the soup was a pinch of onion salt and garlic powder. Hey, when Campbells’s gets something right, why mess with perfection?
Only problem is all the mystery junk-o-la that they put in their soups. Do they taste good? You bet they do, and Campbell’s mostly has MSG to thank for that. That’s something I never realized or even thought much about until I met a girl in college who was viciously allergic to MSG. One day she said she couldn’t eat any of Campbell’s soups and reminded me about her allergy. I was SO appalled. Do you mean to tell me that good old, hearty, homey, traditional, American, Campbell’s soup is made with MSG? Oh, for shame!
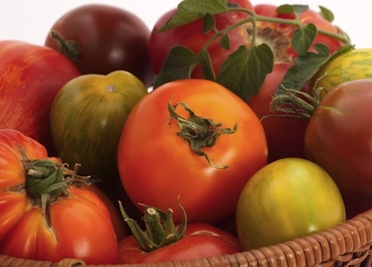
Today I was inspired to try and recreate that youthful comfort food in my own kitchen. The inspiration was a glut of tomatoes from our garden, most of which had seen better days.
You’ve got to get the skins off the tomatoes if you want to do it justice. So this recipe has a bit of extra labour involved, but not to worry, it ain’t too difficult. Besides, creamy tomato soup, minus all the baddies, is totally worth it. Right?
- Crémeux Soupe à la Tomate
Makes: 6 or more bowls
Prep Time: 20-30 minutes
Cooking Time: 40-45 minutes
Ingredients:
15 large Tomatoes
2 cans of Chunk Tomatoes
1 large Onion (roughly chopped)
1 stalk Celery (sliced thin)
3 cloves Garlic (roughly chopped)
6-10 leaves of fresh Basil
6 tbs Butter
2 tbs Flour or Corn Starch
3 cups Soy (or other) Milk
2 cups Vegetable or no-Chicken Broth
1 tbsp onion salt
.5 tsp garlic powder
.5 tsp pepper
.5 tsp thyme
.25 tsp rosemary powdered
pinch of cayenne
pinch of ginger
salt (to taste)
* optional: 1/2 cup Parmesan cheese
Tools:
large stock pot
blender
slotted spoon
large bowl or pot of cold water
empty mixing bowl
cup of luke warm water
Directions:
1. Fill stock pot with water and bring to a boil.
2. Using the slotted spoon, gently place fresh tomatoes into the boiling water and boil for 2-4 minutes, removing each tomato when you see a split in it’s skin.
3. Place boiling tomatoes into the bowl of cold water to cool them. You may need to replace the water once or twice with cold water before the tomatoes are able to be handled.
4. When tomatoes are cool, squeeze them individually with your hands to remove the skin, either squeeze or cut out the top, hard portion of each tomato (where the stem connects) and then place the rest of the tomato into your empty bowl.
5. Once all tomatoes have been hand-processed, place them into the pot you will be using to make your soup.
6. Roughly chop onions & garlic. Sauté until softened a bit and add them to the soup pot.
7. Add celery, basil, butter, milk, broth and spices to the soup pot.
8. Simmer for 30 minutes on medium heat.
9. Remove from heat and blend until smooth.
10. Dissolve flour in a small cup of luke warm water and then add to soup.
11. Stir and simmer on low for 10-15 more minutes.
12. Taste your soup and feel free to tweak the spices or flour content to get your preferred taste and consistency.
13. Serve with sandwiches, salad or crusty bread. Yum!