My Vegetarian Weight Loss
May 29th, 2009 by Mama
“There is no disease, bodily or mental, which adoption of vegetable diet, and pure water has not infallibly mitigated, wherever the experiment has been fairly tried.”
~ Percy Bysshe Shelley, English poet (1792-1822)
I have been following a vegetarian/vegan diet for over one-and-a-half years now and the changes to my health, vitality and weight have been marked. Though they were dramatic in the beginning, the changes have fallen into a more sensible “steady shift” type of pattern and keep on coming.
Always very thin in my youth, college did a number on my weight and energy levels. By the time I left undergraduate school I had ballooned from my “skin-and-bones” weight of 120 pounds to a very porky 200 pounds.
I later lost that weight when I went to Europe for my graduate degree, but unfortunately gained it all right back upon hitting American soil a couple of years later. The easy abundance of cheesy, greasy, sugary pre-prepared goodies was just too much for my simple brain to handle, not to mention the unavoidable change from walkable communities to long drives in an automobile.
Though I had tried being a vegetarian during my idealistic high school days, it wasn’t until someone came into my life who didn’t just read and dream about vegetarianism, ethical consumerism and raw foods but actually lived those beliefs that I finally became motivated to follow through on my dreams of healthy living.
At first I just did a slow transition, eliminating and then reintroducing certain foods such as dairy, chicken, fish, until I came to understand how different foods effected my system. Then I settled into a longer term transition diet of lots of fresh foods, no chicken, pork, beef or other earth-bound creatures, and the occasional monthly piece of fish until I slowly transitioned to where I am today.
I presently eat no meat, fish or dairy with only the occasional indulgences in a fried egg or a sugary treat. I have substituted agave syrup for sweetener and am now aiming my sights on eliminating wheat in the next five or six months.
At the start, the beneficial change in my energy was almost immediate once I settled into a dairy-free, meat-free pattern. My sleep was less disturbed, my sinuses were less clogged and the excruciating pain in my knees became more of a nagging pain than a sharp torture. Several years of painful and irregular menstruation gave way to a virtually PMS-free, regular cycle.
When I first began the vegetarian transition, in late summer of 2007, I weighed 210 pounds (an awful lot for a woman who is only 5 feet tall) and couldn’t walk to the end of my own street without being winded and tired. By the summer of 2008 I was able to hike 8 miles before becoming too tired to push onward, which I’d say is a fair bit of improvement.

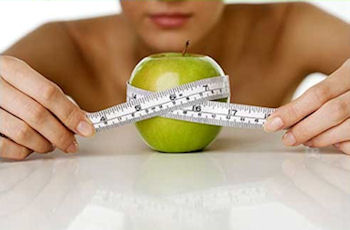
Today I have shed over 40 pounds and have no trouble keeping it off. The weight loss has been slow-but-steady and there has been no up-again, down-again roller coaster in the way that the weight has been shed. With very minimal attempt at exercise, I am half way toward my weight loss goal and am now sharing my success with all of you.
Am I proud that I went from the girl who everyone used to pick on for being too skinny, to the girl that everyone knows who became fat after high school? No, not particularly.
Am I proud that I have found my way to a balanced, nature-based lifestyle that is constantly improving the quality of my life and my health? Absolutely!
I am sharing my experience so that others may be inspired to adopt more balanced, healthy ways of living, and also because I would love encouragement and accountability form my readers on the next leg of my journey toward ultimate health.
- My hopes for the coming year are:
1. To faithfully do my daily physical therapy exercises for the strengthening of my knees.
2. To give at least 30 days over to a raw food diet.
3. To eliminate obvious sources of wheat from my regular diet.
4. To detox using sauna, colonics, acupuncture and herbal cleanses.
5. To branch out from yoga and hiking to biking and jogging, knees permitting.
6. To find the courage to faithfully implement a 6-12 month voyage on the anti-candida (Body Ecology) diet so that I may finally be rid of my limiting food allergies!
7. To continue to develop more flavorful and fun recipes that make healthy eating more exciting.
So, I know that I can get most of these things done with the same dedicated, educated and gentle approach that I have used to introduce other big changes to my health. I also know that there will be physical and emotional challenges along the way and I hope that some of you will be supportive of me along the way.
Maybe you could even be inspired to join in!